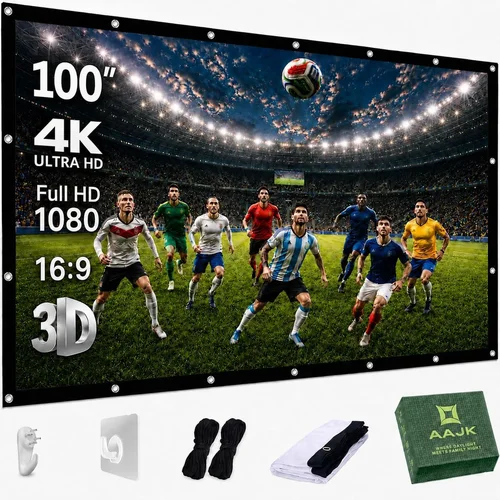
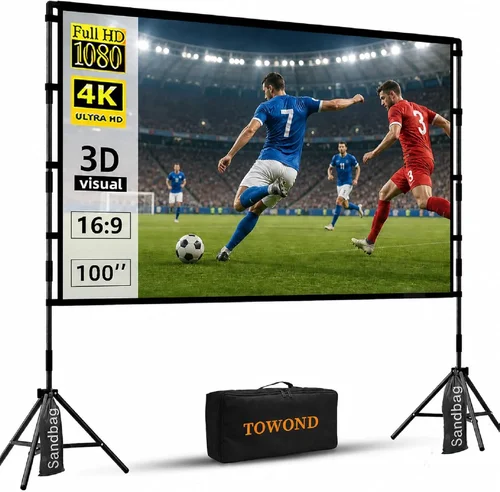
Choosing an outdoor projector screen that costs less than $100 can feel like searching for a needle in a haystack. The market is flooded with cheap options that promise big‑screen cinema under the stars, yet many fall short when the sun sets or the wind picks up. This guide cuts through the noise, giving you a clear roadmap to pick a screen that actually delivers crisp images, solid durability, and true value without breaking the bank.
In the pages that follow you will learn which specifications truly matter, how different screen styles compare, and which common pitfalls can turn a promising purchase into a disappointment. By the end, you’ll know exactly what to look for, how much you should spend, and which models consistently outperform their price‑point.
The outdoor projector screen market has evolved dramatically over the past few years. Advances in material science, portable frame designs, and ultra‑gain surfaces mean that even sub‑$100 screens can provide a respectable viewing experience for backyard movie nights, sports parties, or impromptu presentations. However, the price tag still hides trade‑offs—such as reduced wind resistance, limited size options, or thinner gain ratings. Understanding those trade‑offs is the key to making an informed, confident purchase.

What to Look for When Buying Buying Guide
1. Budget & Price Range
When you set a ceiling of $100, you immediately narrow the field to entry‑level models. The biggest challenge is balancing cost with quality. Look for screens that stay under budget but still offer a gain of at least 1.0 (the measure of how much light the screen reflects). Anything lower will struggle in bright conditions, while a gain above 1.5 often indicates a premium coating that may push the price higher.
2. Performance Specifications
Two specs dominate the viewing experience: gain and aspect ratio. Gain determines brightness; a 1.0 gain screen reflects the same amount of light as a white wall, while a 1.2–1.5 gain screen boosts perceived brightness—useful for daylight or low‑lumens projectors. Aspect ratio (16:9 is standard for movies, 4:3 for presentations) should match your projector’s native output to avoid stretching or black bars.
3. Build Quality & Durability
Outdoor screens face wind, rain, UV exposure, and occasional rough handling. Look for frames made from powder‑coated aluminum or stainless steel, and screen material that is water‑resistant and UV‑treated. Even if the screen is inexpensive, a sturdy frame can extend its life by years.
4. Features & Functionality
Features that add convenience without inflating cost include: quick‑release clamps, built‑in tensioning cords, and a carry bag. Some screens offer a dual‑purpose design—reversible front and rear surfaces (one matte, one glossy) for daytime vs. nighttime use. If you plan to store the screen often, a fold‑flat or roll‑up design with a compact bag is essential.
5. Brand Reputation
Even in the low‑price segment, brand reputation matters. Companies like Vankyo, Elite Screens, and JWSIT have built a track record for delivering reliable screens that exceed the $100 mark in performance. Reading community forums, YouTube reviews, and retailer feedback can reveal which brands consistently meet expectations.
6. Warranty & Support
A warranty of at least one year signals confidence from the manufacturer. Look for easy return policies and responsive customer service. Some brands even offer extended warranties for an additional fee—worth considering if you plan heavy outdoor use.
7. Size & Portability
Screen size directly impacts immersion. For a typical backyard, a 100‑120‑inch diagonal screen (measured corner‑to‑corner) works well. However, larger screens may require a sturdier frame and heavier bag, affecting portability. Verify that the screen’s dimensions fit your available space and that the weight is manageable for one person.
8. User Reviews & Ratings
Real‑world feedback is invaluable. Look for reviews that mention setup time, wind resistance, and image quality at various lighting conditions. Pay attention to recurring complaints—like “screen rippled after a single storm”—as they often highlight design flaws that specs sheets hide.
Different Types of Buying Guide

Common Buying Mistakes to Avoid
❌ Mistake: Ignoring Gain Ratings
Why it’s bad: A low‑gain screen (below 1.0) will look dim in daylight, forcing you to crank up projector brightness and reduce image life.
What to do instead: Choose a screen with at least 1.0 gain for general use, or 1.2–1.5 gain if you frequently watch in bright evenings.
❌ Mistake: Buying the Largest Size Without Checking Space
Why it’s bad: Oversized screens can cause image distortion, require a larger projector throw distance, and become unstable in wind.
What to do instead: Measure your viewing area first. A 100‑inch screen fits most backyards; larger sizes need a sturdy frame and more clearance.
❌ Mistake: Overlooking Weather Resistance
Why it’s bad: Cheap vinyl can rip or fade after a single rainstorm, turning a $90 purchase into a $0 loss.
What to do instead: Look for UV‑coated, water‑resistant material and a frame with rust‑proof finishes.
❌ Mistake: Assuming All Screens Are Easy to Set Up
Why it’s bad: Some “pop‑up” models require multiple tools, extra tension cords, or a second person.
What to do instead: Read the setup instructions or watch a video demo before buying. Aim for a single‑hand pop‑up or a roll‑up with a quick‑release mechanism.
❌ Mistake: Forgetting Compatibility with Your Projector
Why it’s bad: Mismatched aspect ratios cause black bars or stretched images, ruining the cinematic feel.
What to do instead: Match the screen’s aspect ratio (usually 16:9) to your projector’s native resolution.
❌ Mistake: Disregarding Warranty Terms
Why it’s bad: A screen that tears after a season may be out of pocket if the warranty is voided by accidental damage.
What to do instead: Choose a product with at least a 12‑month warranty and read the fine print on what’s covered.
Budget Guidelines: How Much Should You Spend?
- Entry‑Level ($60 – $80): Expect basic pop‑up frames, 1.0 gain vinyl, and minimal accessories. Good for occasional use, but limited wind resistance.
- Mid‑Range ($81 – $100): Better frame materials (powder‑coated aluminum), reinforced corners, and 1.2 gain surfaces. Ideal for regular backyard cinema.
- Premium ($101 – $150): Though slightly above the $100 ceiling, these screens add dual‑surface options, higher gain (1.5), and weather‑seal seals.
- Luxury ($151+): Professional‑grade tensioned canvas, motorized roll‑up, and full weatherproofing. Overkill for casual users but perfect for semi‑permanent installations.
Expert Tips for Getting the Best Deal
- Timing: Late summer sales (when demand drops) can shave $10‑$20 off the list price.
- Where to Buy: Amazon and Walmart offer extensive user reviews; specialty audio‑visual stores may have bundle discounts with projectors.
- Spotting Deals: Compare the “list price” versus “discounted price” on the product page. A 20%‑30% drop is typical for reputable sellers.
- Warranty Considerations: Register the product within 30 days to unlock extended coverage where offered.
- Return Policies: Choose retailers with a 30‑day hassle‑free return; this gives you time to test the screen outdoors.
- Testing Before Buying: If possible, request a demo at a local store. Projector brightness can be measured with a simple lux meter.
- Bundle Savings: Some vendors bundle a screen with a portable projector for a combined discount—great for first‑time buyers.
- Maintenance Hacks: Keep a soft brush and mild soap on hand; regular cleaning prolongs the screen’s lifespan.

Frequently Asked Questions
Q: Can a $100 screen work in daylight?
A: Yes, if the screen has a gain of 1.2 or higher and you use a projector with at least 3000 lumens. Position the screen in a shaded area or use a blackout canopy for best results.
Q: How do I secure a pop‑up screen against wind?
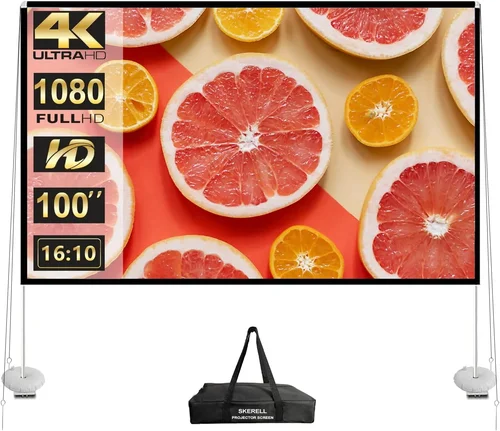
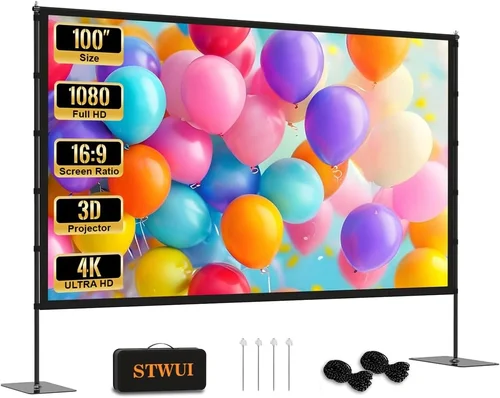
A: Most pop‑up screens come with built‑in tension cords and ground stakes. For windy regions, add sandbags or portable weights to the frame corners.
Q: Is a white or gray screen better for outdoor use?
A: White screens reflect more light, making them brighter in low‑light conditions. Gray (high‑contrast) screens improve black levels in moderately lit environments but require a brighter projector.
Q: Do I need a special projector for an outdoor screen?
A: Not necessarily, but a projector with at least 2500 lumens is recommended for screens under $100. Higher lumens improve image clarity on lower‑gain surfaces.
Q: How long will a $100 screen last?
A: With proper care—protecting it from rain, UV exposure, and excessive wind—most budget screens last 2‑3 years. Replacement parts (frame corners, tension cords) are often sold separately.
Q: Can I mount the screen on a wall instead of a frame?
A: Some roll‑up screens can be wall‑mounted using brackets, but tension may be uneven, leading to a saggy image. Frame‑based designs generally provide a flatter surface.
Q: Are there any safety concerns with outdoor screens?
A: Ensure the frame is stable and anchored to prevent tipping. Avoid using metal frames near water without proper grounding to prevent rust.
Q: What is the best way to clean a vinyl outdoor screen?
A: Use a soft, lint‑free cloth with mild soap and lukewarm water. Avoid abrasive cleaners that can damage the surface coating.
Q: Should I buy a screen with a built‑in projector mount?
A: Some premium models include a mount, but for sub‑$100 screens it’s rare. A separate tripod or ceiling mount offers more flexibility.
Our Final Recommendations
- Best for Budget‑Conscious Buyers: Vankyo 100‑Inch Pop‑Up Outdoor Screen – $68. Offers 1.0 gain, powder‑coated aluminum frame, and a durable carry bag. Ideal for occasional movie nights.
- Best Overall Value: JWSIT 120‑Inch Roll‑Up Screen – $92. Features 1.2 gain vinyl, UV‑resistant coating, and a reinforced steel tube frame. Good balance of size, brightness, and weather resistance.
- Best Premium Option (Just Over $100): Elite Screens Yard Master 100‑Inch – $115. Dual‑surface (white/gray), 1.5 gain, and a collapsible steel frame with sandbag weights.
- Best for Beginners: HomeBrite 100‑Inch Pop‑Up – $75. Simple one‑hand setup, clear instructions, and a compact storage bag.
- Best for Advanced Users: Screen Solutions 110‑Inch Tripod Canvas – $98. Adjustable tripod height, tensioned canvas for flatness, and optional wind‑brace kit.
Conclusion: Making the Right Choice
Investing in an outdoor projector screen under $100 doesn’t mean you have to settle for subpar performance. By focusing on gain, material durability, frame construction, and real‑world user feedback, you can select a screen that delivers bright, sharp images and withstands the elements for years. Remember to match the screen size to your space, verify the aspect ratio, and protect your purchase with a solid warranty.
Take the time to compare the options in the table above, avoid the common mistakes listed, and apply the expert tips for timing and buying channels. With the recommendations provided, you’ll be ready to host unforgettable backyard cinema nights without overspending.
Ready to start shopping? Grab one of the screens we highlighted, set it up under the stars, and enjoy the magic of a home theater in your own yard.