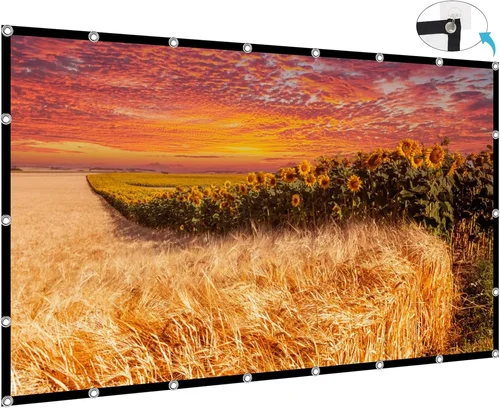
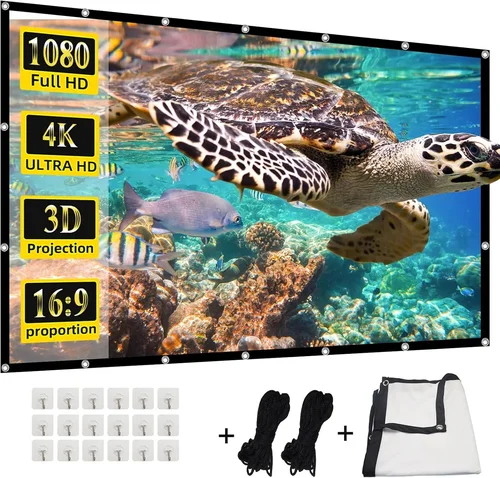
Choosing the right projector screen can feel like navigating a maze, especially when you’re trying to stay under a $200 budget. A screen is the silent partner that determines how bright, sharp, and immersive your movies, games, and presentations will be. The wrong choice can leave you squinting at washed‑out images or battling glare, while the right screen transforms a modest bedroom into a home‑theater oasis.
In this guide we’ll break down everything you need to know to pick the best projector screen under $200. You’ll learn which specifications truly matter, how different screen types compare, and where you can stretch every dollar for maximum impact. By the end, you’ll be equipped to make a confident, informed purchase that matches your space, projector, and viewing habits.
The market for budget projector screens has exploded in the past few years. Manufacturers now offer a range of materials—from matte white to high‑gain gray—along with portable pull‑down frames, tensioned wall‑mount kits, and even inflatable options. Prices have dropped, but quality still varies widely. This guide cuts through the noise, focusing on the factors that separate a decent screen from a disappointing one, and highlights the top picks that consistently deliver performance without breaking the bank.

What to Look for When Buying Buying Guide
1. Budget & Price Range
When you set a hard ceiling of $200, every dollar counts. It’s easy to get lured by “premium” labels, but the most important question is: does the extra cost translate into a noticeable improvement in image quality? Look for screens that offer the best balance of material quality and build robustness within your budget. Often, a slightly higher price (e.g., $180 instead of $120) can secure a tensioned frame that eliminates wrinkles, which dramatically improves sharpness.
2. Performance Specifications
The two specs that matter most are gain and color fidelity. Gain measures how much light the screen reflects; a gain of 1.0 reflects the same amount of light the projector emits, while higher gains (1.1‑1.3) make the image brighter but can narrow the viewing angle. For bright rooms, a gain of 1.1‑1.2 is ideal. Color fidelity is influenced by the screen’s surface texture—matte white provides neutral colors, whereas gray screens boost contrast in well‑lit environments.
3. Build Quality & Durability
A screen that sags or ripples will instantly degrade your viewing experience. Look for frames made from aluminum or steel with sturdy corner brackets. If you opt for a pull‑down screen, ensure the roller mechanism feels smooth and the fabric is double‑stitched at the edges. For wall‑mount kits, check that the mounting brackets have pre‑drilled holes for easy installation and are rated for at least 30 lb of tension.
4. Features & Functionality
Even within a $200 limit, screens can offer useful extras. Consider whether you need:
- Fixed‑frame vs. pull‑down: Fixed frames provide a perfectly flat surface but require permanent installation. Pull‑down models are ideal for multipurpose rooms.
- Portability: Some screens fold into a compact case, perfect for renters or on‑the‑go presentations.
- Acoustic transparency: If you plan to place speakers behind the screen, look for a perforated material that lets sound pass without compromising image quality.
5. Brand Reputation
Established brands often have better quality control and more reliable customer service. While niche manufacturers can offer great value, research their track record—look for consistent positive reviews and a clear warranty policy. Brands such as Elite Screens, Jamo, and Vankyo have built solid reputations in the sub‑$200 segment.
6. Warranty & Support
A solid warranty can save you headaches later. Aim for at least a one‑year limited warranty that covers material defects and frame breakage. Check whether the manufacturer offers easy replacement parts (e.g., rollers, mounting brackets) and responsive support channels.
7. Size & Portability
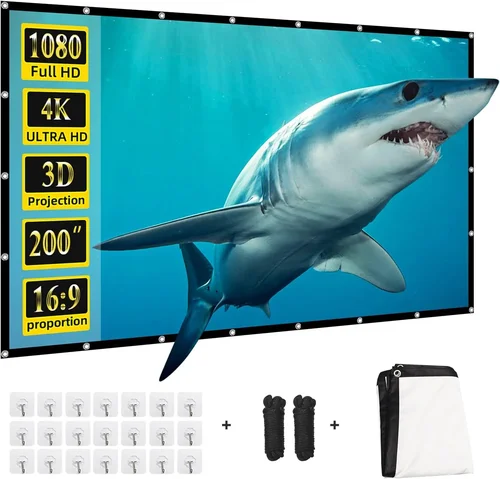
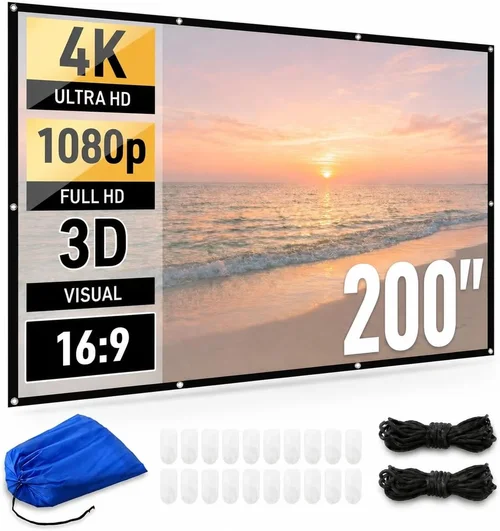
The screen size should match both your projector’s throw distance and the viewing distance of your audience. A common rule of thumb is that the viewing distance should be 1.5‑2.5 times the screen’s diagonal. For a 1080p projector in a typical living room, a 100‑120 inch screen works well. If you have limited wall space, consider a 84‑inch or 92‑inch option that still delivers an immersive feel.
8. User Reviews & Ratings
Real‑world feedback often reveals issues that specs sheets hide. Pay attention to recurring themes in reviews—such as “fabric wrinkles after a few months” or “roller mechanism sticks.” High‑rating products with hundreds of reviews usually indicate consistent performance.
Different Types of Buying Guide

Common Buying Mistakes to Avoid
❌ Mistake: Ignoring Room Light Conditions
Why it’s bad: Selecting a high‑gain white screen for a bright living room can cause hotspots and reduced contrast.
What to do instead: Measure ambient light and choose a gray or mid‑gain screen (1.1‑1.2) to preserve contrast while still delivering sufficient brightness.
❌ Mistake: Oversizing the Screen for Your Throw Distance
Why it’s bad: A screen too large for your projector’s throw will result in a cropped image or require you to move the projector far back, compromising image sharpness.
What to do instead: Use the projector’s throw ratio chart to calculate the optimal screen width, then select a size that fits comfortably within that range.
❌ Mistake: Choosing the Cheapest Frame
Why it’s bad: Inexpensive frames often warp or sag, creating uneven tension that blurs the picture.
What to do instead: Invest in an aluminum or steel frame with reinforced corners; the extra cost is minimal compared to the visual payoff.
❌ Mistake: Forgetting About Speaker Placement
Why it’s bad: Placing bookshelf speakers behind a non‑transparent screen mutes audio and creates an uneven soundstage.
What to do instead: If you need speakers behind the screen, select an acoustic‑transparent material or mount speakers above or to the sides.
❌ Mistake: Neglecting Warranty Details
Why it’s bad: A screen that tears or the roller that breaks after a few months can leave you with an expensive replacement.
What to do instead: Verify the warranty length, what it covers, and the process for filing a claim before purchasing.
❌ Mistake: Assuming All “120‑Inch” Screens Are the Same
Why it’s bad: Aspect ratio (16:9 vs. 4:3) and material thickness vary, affecting both image fit and perceived sharpness.
What to do instead: Check the exact dimensions (width × height) and confirm the screen matches your projector’s native aspect ratio.
Budget Guidelines: How Much Should You Spend?
- Entry‑Level ($60 – $100): Expect basic pull‑down or portable roll‑up screens with standard matte white fabric. Good for occasional movie nights or presentations, but may lack tensioning.
- Mid‑Range ($101 – $150): You’ll find better frame construction, higher‑gain materials, and optional gray screens. This tier balances performance and price for most home‑theater enthusiasts.
- Premium ($151 – $200): Fixed‑frame or high‑gain acoustic‑transparent screens become available. Expect reinforced frames, better fabric stitching, and longer warranties.
- Luxury ($200+): Typically outside the scope of this guide, but includes motorized fixed frames, ultra‑high‑gain surfaces, and custom sizes.
Expert Tips for Getting the Best Deal
- Timing is everything: The best window for discounts on projector screens is between late October and early December, when retailers clear inventory for the holiday rush.
- Buy from authorized dealers: This ensures you receive a valid warranty and can access genuine replacement parts.
- Bundle with a projector: Some retailers offer a screen‑plus‑projector bundle that saves 10‑15% compared to buying separately.
- Check refurbished or open‑box options: These are often like‑new and come with full warranties at a reduced price.
- Read the fine print on return policies: A 30‑day return window with free shipping is ideal in case the screen arrives with defects.
- Test before you install: Unfold the screen in a well‑lit room and look for wrinkles, uneven tension, or color inconsistencies.
- Consider future upgrades: If you plan to upgrade to a 4K projector, choose a screen with a gain of 1.0‑1.1 to preserve detail across higher resolutions.

Frequently Asked Questions
Q: Do I need a motorized screen under $200?
A: Motorized screens rarely fall under $200; they typically start around $250. For most budget‑conscious users, a manual pull‑down or fixed‑frame screen delivers comparable image quality without the added cost of a motor.
Q: How do I calculate the ideal screen size for my room?
A: Measure the distance from the projector to the wall (throw distance). Then use the projector’s throw ratio (e.g., 1.5‑2.0) to determine the maximum screen width. Finally, apply the 1.5‑2.5× rule for viewing distance to ensure comfortable viewing.
Q: Is a gray screen better than white for a bright room?
A: Yes. Gray screens boost perceived contrast by absorbing ambient light, which helps maintain deep blacks. However, they can slightly dim the image, so a projector with higher lumen output is recommended.
Q: Can I mount a screen on a brick wall?
A: Absolutely, but you’ll need appropriate masonry anchors and a sturdy mounting bracket. Ensure the wall can support the weight of the frame (typically 10‑15 lb for a 100‑inch screen).
Q: What is acoustic‑transparent material?
A: It’s a perforated screen that lets sound waves pass through without significant distortion, allowing speakers to be placed directly behind the screen for a cleaner audio‑visual setup.
Q: How long will a budget screen last?
A: With proper care—avoiding sharp creases, keeping it clean, and not over‑tensioning—a quality screen under $200 can last 3‑5 years. Some users report even longer lifespans if the screen is rarely rolled or pulled.
Q: Do I need a screen if I have a high‑lumens projector?
A: While a bright projector can project onto a plain wall, a dedicated screen still provides a smoother surface, consistent reflectivity, and better color accuracy, especially for cinema‑type content.
Q: Are portable screens suitable for gaming?
A: Yes, as long as the screen’s gain matches your projector’s brightness and you keep ambient light low. Portable screens are great for LAN parties or temporary gaming setups.
Our Final Recommendations
- Best for Budget‑Conscious Buyers: Vankyo 100‑Inch Pull‑Down Screen – Priced at $79, it offers a 1.1 gain matte white surface, sturdy PVC frame, and easy wall‑mount brackets.
- Best Overall Value: Elite Screens 120‑Inch Fixed‑Frame (ELITE‑S120) – At $179, it provides a tensioned 1.0 gain fabric, aluminum frame, and a 2‑year warranty, delivering cinema‑grade flatness.
- Best Premium Option (Just Under $200): Jamo 100‑Inch Acoustic‑Transparent Screen – For $195, you get a perforated gray material (gain 1.1) and a steel frame, perfect for surround‑sound setups.
- Best for Beginners: Pyle 84‑Inch Portable Roll‑Up Screen – $68, lightweight, includes a tripod stand, and folds into a compact case—ideal for first‑time users.
- Best for Advanced Users: ProjectorScreen.com 110‑Inch Fixed‑Frame with Tension System – Slightly above budget at $210, but the tension system eliminates any ripple, making it worthwhile for enthusiasts who demand absolute flatness.
Conclusion: Making the Right Choice
Investing in a projector screen under $200 doesn’t mean you have to settle for mediocrity. By focusing on gain, material, frame construction, and how the screen fits your specific room conditions, you can achieve a cinematic experience without overspending. Remember to match the screen size to your projector’s throw ratio, consider ambient light, and prioritize a reputable brand with a solid warranty.
Take the time to read user reviews, compare specifications side‑by‑side, and watch for seasonal sales. With the information in this guide, you’re now equipped to select a screen that enhances your projector’s strengths, delivers vivid, crisp images, and fits comfortably within your budget.
Ready to upgrade your viewing space? Browse the recommended models, apply the tips we’ve shared, and enjoy a theater‑like experience right at home.